I have trouble fixing the terrible seams I'm getting. I've followed Elli's print tuning guide and calibrated extruder, tuned PA (it's now 0.035) and extrusion multiplier.
I've tried adjusting both retraction length and speed, but it doesn't seem to have much impact. I'm not using "wipe on retract" or "retract on layer change", I only retract if travel distance is longer than 3mm. Retract is 0.3mm @35mm/s.
I've tried reducing PA smooth time too, but this also doesn't seem to have a noticable impact.
I've tried reducing seam gap from the default 10% in Orca all the way down to 0%, but the bad seams persist.
I've tried with "wipe on loops" both disabled and enabled with no difference.
I've tried with both arachne and classic wall generator, no difference.
I've tried different wall orders, inner/outer, inner/outer/inner and outer/inner, all with the same bad seams.
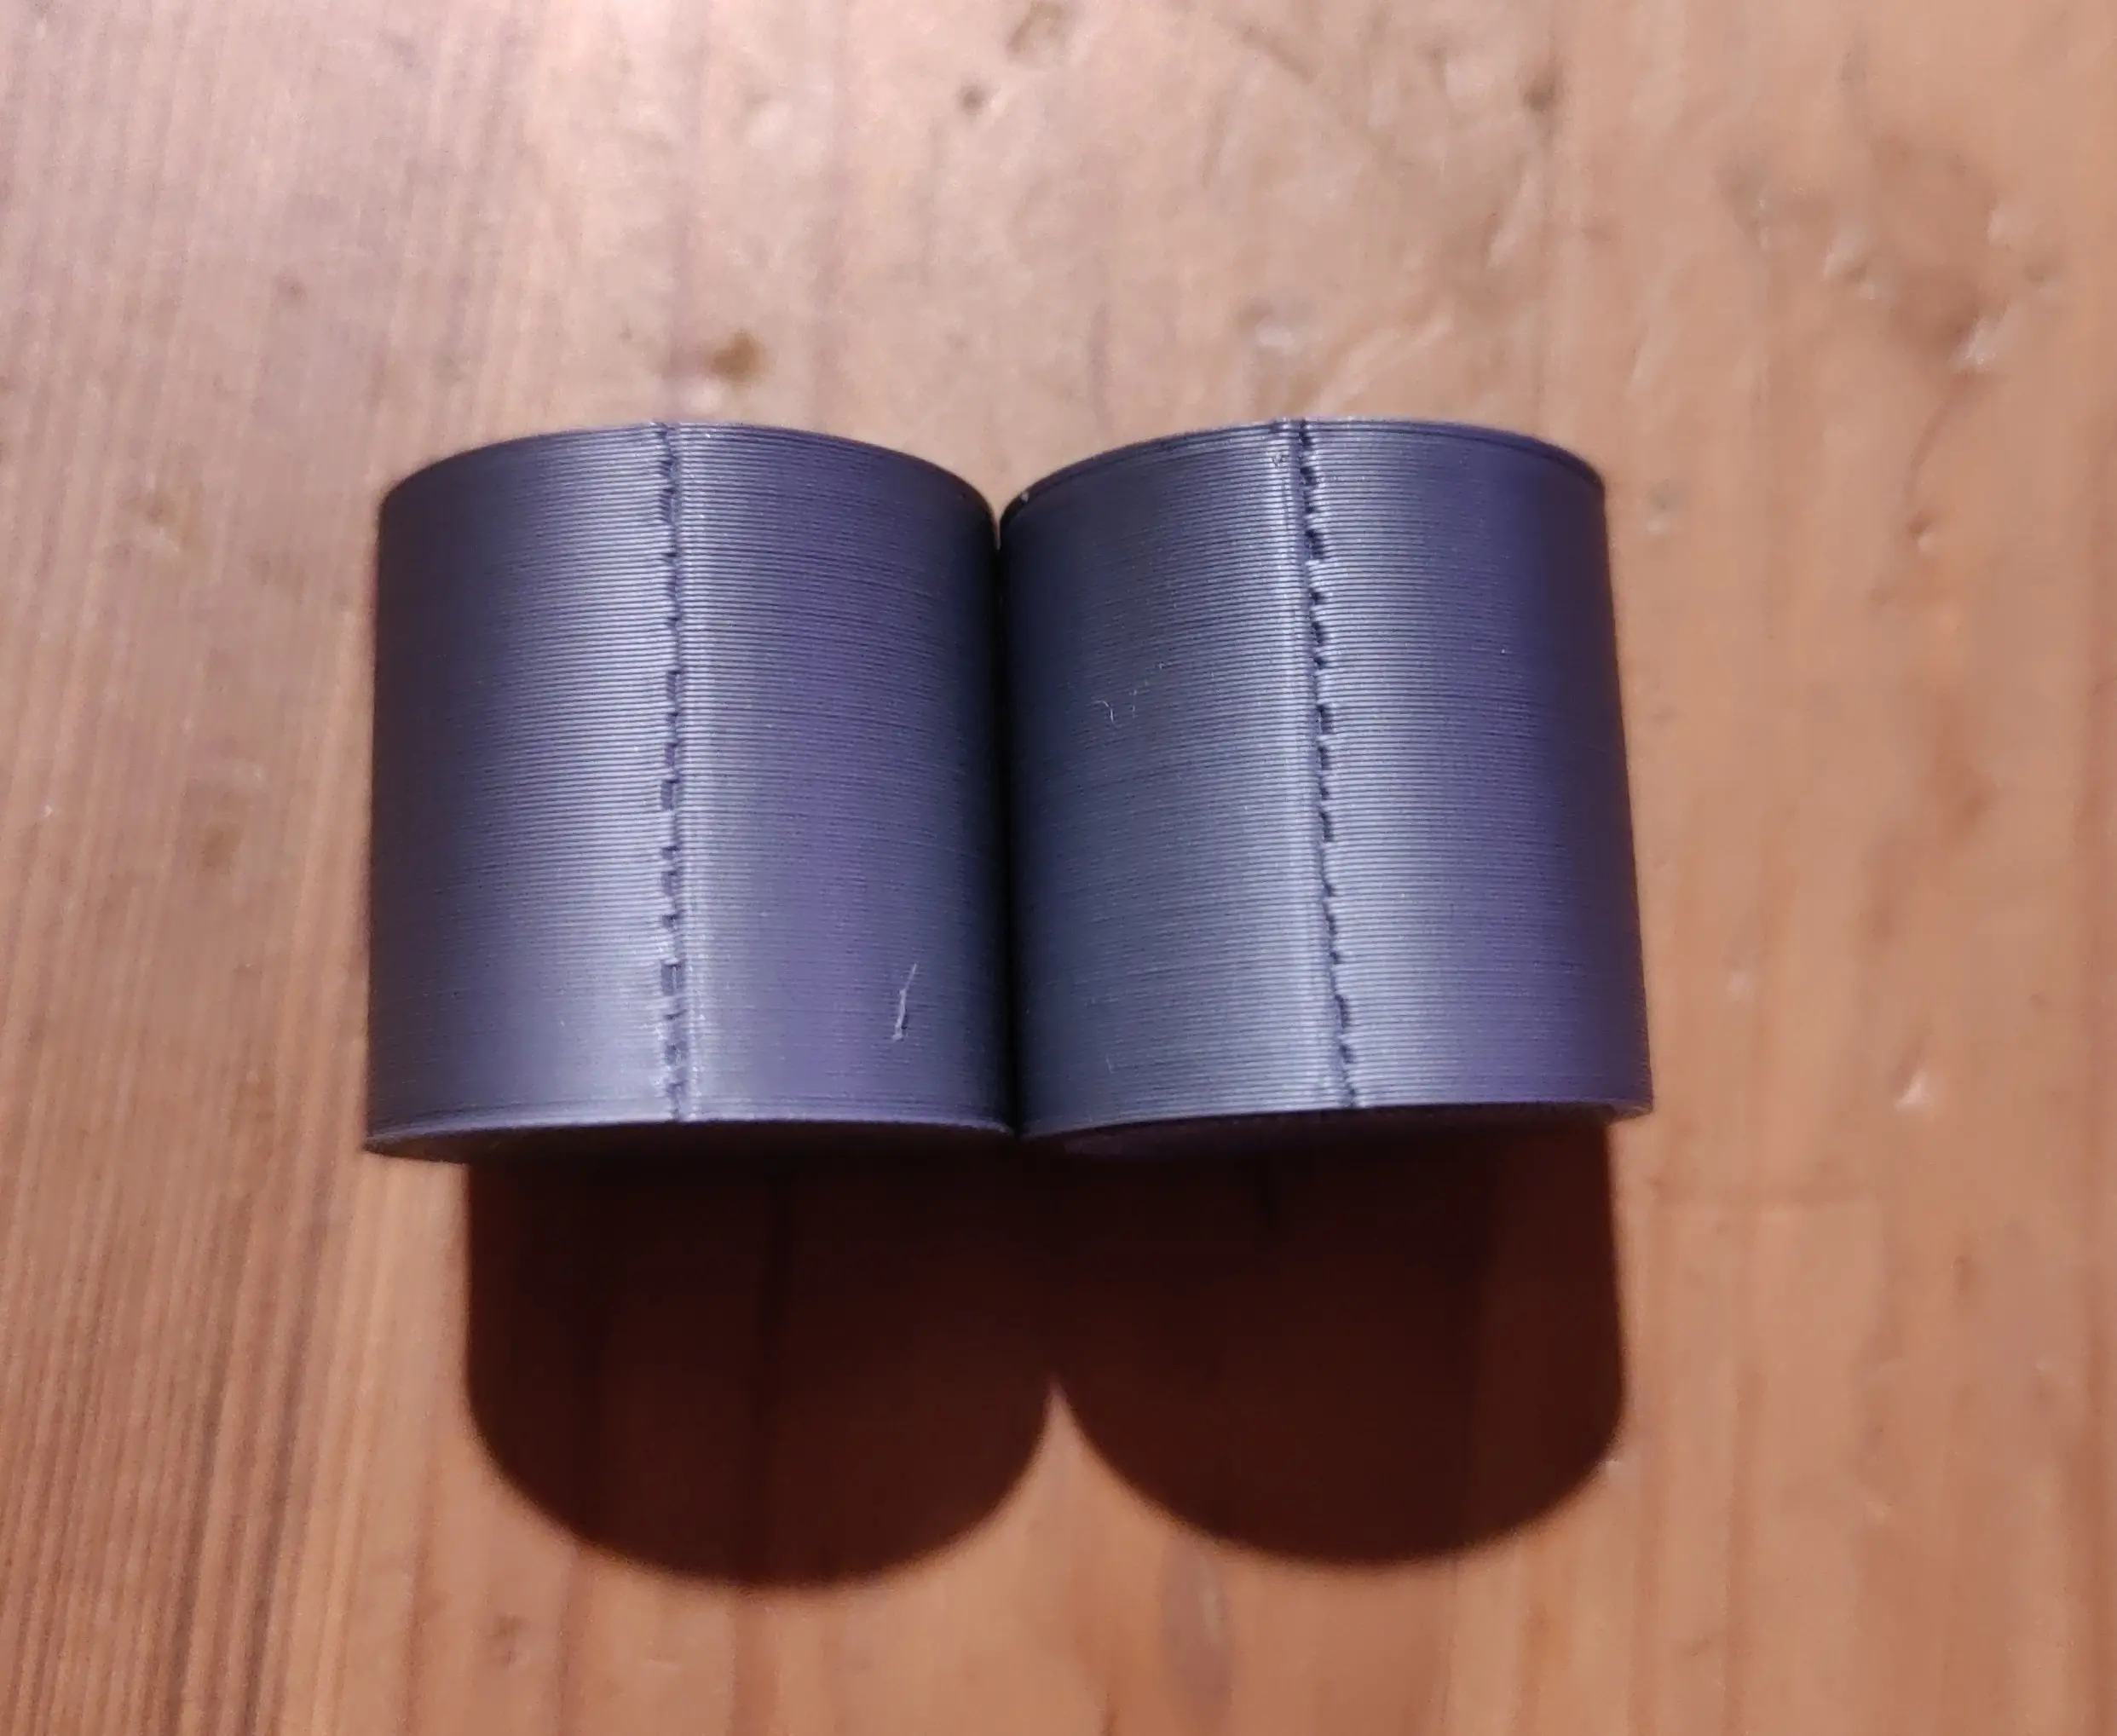
Filament in the picture is matte PLA, it is without doubt dry and generally prints well aside from the seams. It's stored vacuum sealed with silica, and I use a filament dryer to dry if I suspect wet filament.
I'm running out of ideas for where to tweak to get a decent result.
Most probably PA. You should try adjusting it while printing using some g-code console. This way you get immediate feedback. What they often don't tell you is that pressure advance is not something you can calibrate once and forget, it's dependent on material, temperature, nozzle diameter and also a lot on feed rate and extrusion rate.
The need for PA and precise tuning is more pronounced the higher changes in extrusion rate you have eg, you print very fast or with wide or high layers.
Just play around with it a bit and I'm sure that you'll find a better value after some layers.
There are even macros that try to remove the feed rate dependency by effectively replacing every g-code that adjusts feed-rate by a combination of the original g-code pre-ceded by an adjustment of PA. I haven't tried them out yet though.
What's weird is the differences of the effect between the layers. Is the every layer the same or is the path different for different layers? Maybe post some images of the inside of the model.
This is a good idea. I will further add that Klipper lets you dick with the linear/pressure advance parameters mid-print via GUI with its Fluidd interface. Other systems probably have similar capabilities.
A good test model for this might be a thin walled hollow cylinder with the Z seam facing the user (i.e. out the door or front of the machine) only 2 layers thick or so. That sounds like it ought to make the issue visible quickly, and with minimum of wasted time and filament on infill (not to mention ruined parts).